Here's what you will need:
 |
| Fabric and batting |
1 1/4 yards fleece (for the back)
1 1/8 yards cotton (for front)
High loft batting doubled (doubling is optional but makes a thicker more comfy quilt)
Sewing thread
Yarn/Ribbon for tying
Pins
Yard stick
Sewing machine
Scissors
 |
| Back of the quilt with batting on top. |
STEP 1: Lay down the material you chose for the backside, right side facing the work surface. Lay the batting on top trying to keep it even on all 4 sides.
 |
| "Front" material on top. |
STEP 2: Lay the "front" material on top of the batting, making sure it's somewhat even on all of the sides. Not too hard, right?

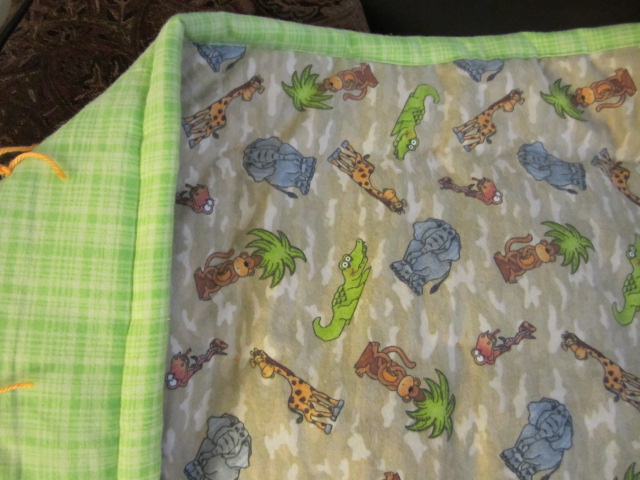
STEP 3: Now you will be preparing to tie the quilt to keep the batting in place. I used a yard stick to divide the blanket into 6" squares. As you can see from the picture, I inserted a pin every 6" all the way across and all the way down the blanket. After I insert a row of pins, I go back and pin the 3-layer "sandwich" together (i.e. just work the inserted pins down through the 3 layers and then back up on the top).
STEP 4: I didn't take a picture of the tying because I didn't think to :( but it's easy. Get your quilting needle and cut a long piece of yarn/ribbon. Insert all the way through the fabric leaving a tail where the pins are going in, and then come back up leaving a little gap between entry and exit points. Double knot and cut. Repeat through the whole blanket.
How big of a gap should you leave between entry and exit points? That all depends on how much yarn/ribbon you want visible on the quilt. Sorry, there's no more specific rule here.
I left about a 2" tail for my yarn but yours can be either shorter or longer. I also tied my quilt on the back side because I don't want the baby to chew on the yarn. It's just my preference so you follow your own heart on this one.
Once you are done tying, you can trim some of the batting and the top piece if they go over the bottom piece. They probably won't but if they do, trim with scissors.
STEP 5: Once you're done tying, you'll start making a border around the quilt. I made a 1" border this time, 2" before that, so once again, the choice is yours.
 |
| Making the border |
I fold the bottom fabric twice and pin. I am showing the first fold in the picture above. Please note that the second fold should go over the batting and the top layer (see the first picture in Step #6). I hope this makes sense.
STEP 6: The corners. There are a couple of ways to make a corner but this is how I do it.

When you get to the end of one side, your quilt will look like this. See the tail?

Fold the it down...
 |
... then start folding the fabric like in step #5. You may have to work a little to get the corners to meet at the pointy edge and the bottom, but it shouldn't be too hard.
STEP 7: After you pin, sew the edges and down to the pointy end of the corners all the way around. Voila, you are done!
 |
| Finished product |


No comments:
Post a Comment